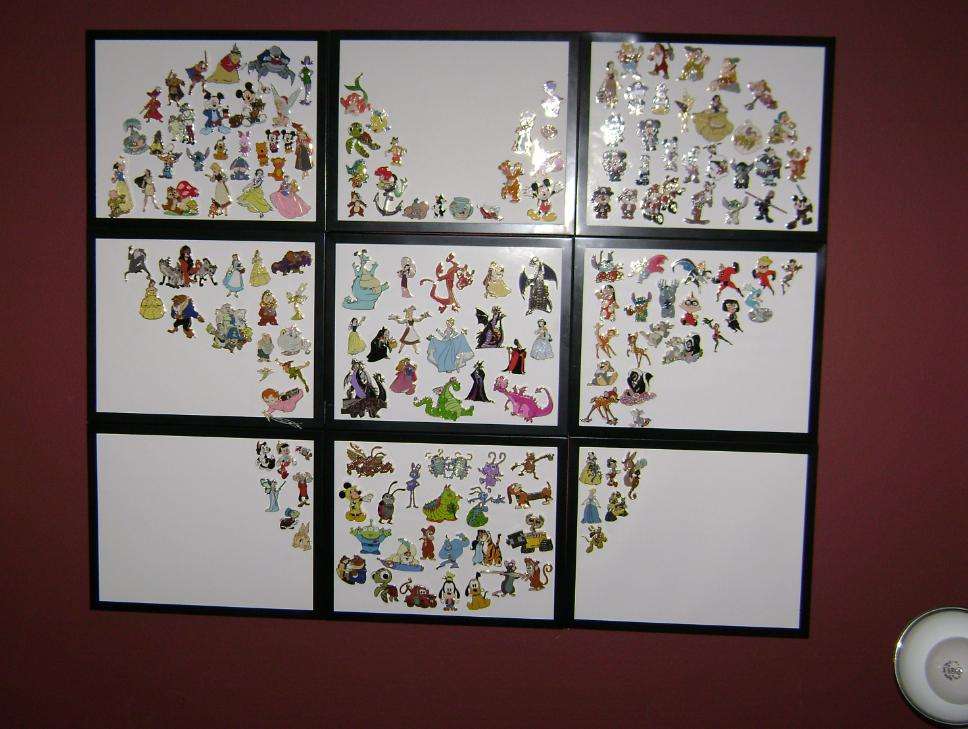
Still, what we end up doing is nowhere near what one of our friends has done with her pin collection. Thanks to Erica for sending this picture for me to show on here. She is one talented girl, and her artistry shows not only in many of the sketches that she has done that I got the privilege to see, but also in the ways she displays her pins. This is one such example. When I first saw this, my jaw dropped. It must have taken a lot of time and effort to do something like this, and it totally makes for an astounding wall display.
I don't have that kind of creativity. I'm too busy battling not having enough wall space to hang all of my pins! :)
Zz.
5 comments:
This is totally awesome! And it will be coming soon to my house...but how is it done? Are they framed bulletin boards painted white? Is there class covering or are they open? Any hints would be appreciated!!!
I'd love to know as well!!! I want this to be my next project!!!!
There is glass covering by the way the flash shines... it looks like multiple simple black frames (like from walmart) and using white paper as the backdrop inside the frames. I would buy the cork squares (office supply) to cut & fit so that the pins would have something to sink into within the frame (cork squares are thinner than an actual board). The size of the light bulb makes me think that these are 8x10 frames - 5x7 frames at the very least. Great idea! <3 it! Niffer
This is just too cool and I've been inspired
I just did this with our pins. I used 8 x 10 frames from Michaels. I removed the glass, and replaced it with 8 x 10 foam board (also from Michaels), and put the back of the frame back on. To get the shape, I used a large bowl as a guide for the ears, to get the curves just right. Once you have the outline, then just fill in the rest of the pins. It looks absolutely amazing.. thank you for such a great idea!
Post a Comment